|
|
||
|---|---|---|
| cli | ||
| client/cli | ||
| core-primitives | ||
| images | ||
| metrics | ||
| pallets | ||
| primitives/machine | ||
| rpc | ||
| runtime | ||
| scripts | ||
| service | ||
| src | ||
| tests | ||
| utils | ||
| .gitignore | ||
| Cargo.lock | ||
| Cargo.toml | ||
| file_header.txt | ||
| LICENSE.md | ||
| README.md | ||
Notes
Arrows will mark the places where your input is needed
Update system
Update Your System: Before installing any new software, it's a good practice to update your system's package list and upgrade the existing packages to their latest versions.
sudo apt update
sudo apt upgrade
Firewall
Install Ubuntu firewall
sudo apt install ufw
If you want to connect to your node-machine, allow connection to the SSH port
sudo ufw allow ssh
Enable firewall, confirm the operation
sudo ufw enable
Check firewall status. You should see Status: active
sudo ufw numbered
SSH
Install SSH
Once you have installed the proper Operating System on you machine we recommend that you enable SSH. Most people have a Daily Driver machine. GHOST requires a separate machine. Adding an extra machine to your life could be cumbersome. Chances are you had to use an external monitor to install Ubuntu on GHOST Node, the same screen regularly used by the Daily Driver machine. SSH enables you to manage your GHOST Nodes remotely from the comfort of your Daily Driver.
Install OpenSSH Server: With your system updated, the next step is to install the OpenSSH server package. This package contains the necessary software to run an SSH server.
sudo apt install openssh-server
Enable SSH Service to Start on Boot: To ensure that the SSH service automatically starts after a reboot, you need to enable it using systemctl.
sudo systemctl enable ssh
To check the status of the SSH service, run the following command:
sudo systemctl status ssh
You should be seeing something like this:
Connect by SSH
With SSH enabled and the firewall configured, you can now connect to your node machine from another computer using SSH. You have to know your username and your local network ip
ssh [username]@[your_server_ip_OR_hostname]
Install GHOST Application
Allow Ports
Allow port 30333 on GHOST Node:
sudo ufw allow 30333
To ensure that the ports are allowed, run the following command:
sudo ufw numbered
Install Substrate Libraries
Click here for a detailed Rust guide if you want to dive deep into the documentation. Otherwise let's proceed.
Install Dependencies
Check the documentation for your operating system for information about the packages that are installed and how to download and install any additional packages you might need. For example, if you use Debian/Ubuntu, you can use the Advanced Packaging Tool (apt) to install packages:
sudo apt install -y build-essential clang curl git make libssl-dev protobuf-compiler llvm libudev-dev
Rust Install
Download the rustup installation program and use it to install Rust by running the following command:
curl --proto '=https' --tlsv1.2 -sSf https://sh.rustup.rs | sh
Press Enter for using default options:
Update your current shell to include Cargo by running the following command:
source $HOME/.cargo/env
Verify your installation by running the following command:
rustc --version
You should see something like this:
Configure the Rust toolchain to default to the latest stable version by running the following commands:
rustup default stable
rustup update
Add the nightly release and the nightly WebAssembly (wasm) targets to your development environment by running the following commands:
rustup update nightly
rustup target add wasm32-unknown-unknown --toolchain nightly
rustup target add wasm32-unknown-unknown --toolchain stable-x86_64-unknown-linux-gnu
IF error try
rustup target add wasm32-unknown-unknown --toolchain default
Verify the configuration of your development environment by running the following command:
rustup show
rustup +nightly show
You should see something like this:
Now run:
rustup component add rust-src --toolchain stable
IF error try
rustup component add rust-src --toolchain default
Install GHOST
Check if Git is already installed:
git --version
Make a GHOST Directory and go to it:
mkdir ghost && cd ghost
Clone GHOST Node Git:
git clone https://git.ghostchain.io/ghostchain/ghost-node.git
Go to ghost-node directory:
cd ghost-node
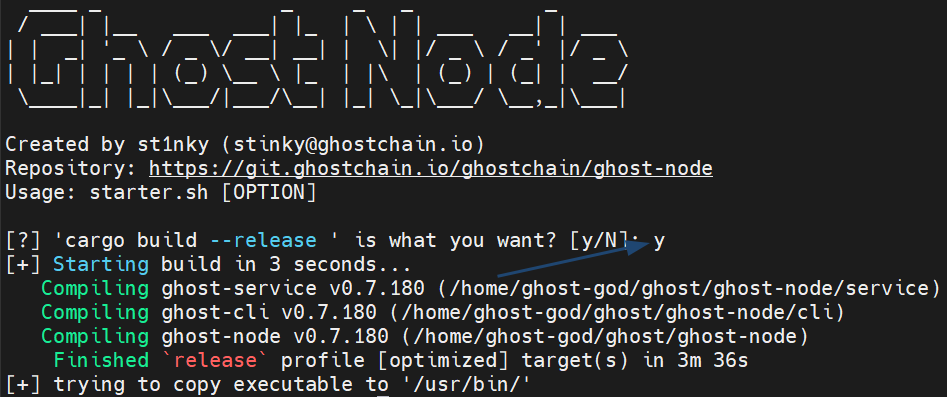
Compile the node template by running the following command:
cargo build --release
The build can take up to 20 minutes depending on the specifications of your machine.
Boot Node Qualification
Boot Node Qualification Test
Becoming a Boot Node on GHOST Chain is an absolute MUST if we want the network to be sufficiently decentralized. However, due to certain ISP limitations some countries make it being a Boot Node easier than others. Hence, the GHOST Dev team came up with a Boot Node Qualification Test.
First we should install TRACEROUTE:
sudo apt install traceroute
Then we must determine the public IP for your GHOST Node Machine.
curl -4 icanhazip.com
Then type the following command replacing <YOUR_IP_FROM_PREVIOUS_STEP> with an actual IP address from previous step:
traceroute <YOUR_IP_FROM_PREVIOUS_STEP>
If your GHOST Node is not behind a NAT your terminal window should look something like this:
If your GHOST Node is behind NAT your terminal window should look something like this:
If your GHOST Node is NOT behind the NAT then your node can be a Boot Node. If your GHOST Node is behind the NAT then your node CANNOT be a Boot Node and you will have to use some kind of proxy to rectify the situation.
Afterwards, post the screenshot of your terminal window in the Whales group. Feel free to blur out your IP.
Setting Proper Firewall Rules
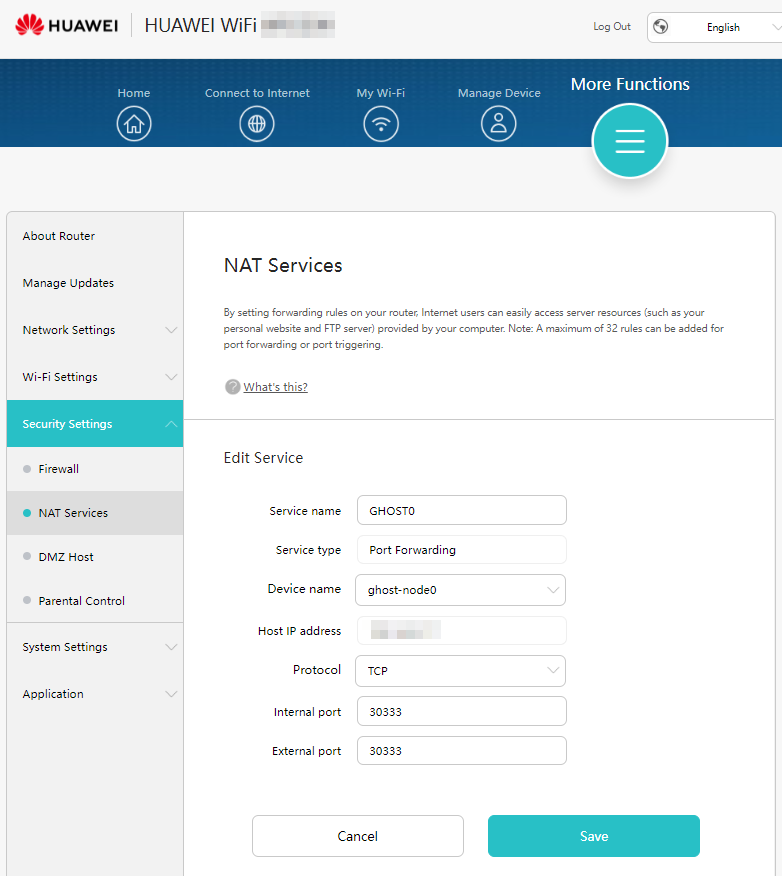
You must enable port 30333 on your router
Based on prior instructions you may have configured your firewall in way that is
no longer needed. For the purpose of GHOST Chain you should only
open port 30333 and close other ports.
Checking Firewall
Check the ports that are opened on your firewall:
sudo ufw numbered
If port 9945 is opened then close it:
sudo ufw deny 9945
Configuring Router
Enable port forwarding for port 30333 on your router. Be mindful that different networks and routers have different ways of setting this up. It is best to search for portforwarding instruction for the specific router model.
Checking Ports
Simulate a broadcasting node by running a dummy GHOST Node launch command:
./target/release/ghost --port=30333 --rpc-port=9945 --chain=dev --node-key=0000000000000000000000000000000000000000000000000000000000000001 --base-path=/tmp/alice --alice --validator --unsafe-rpc-external --no-telemetry --state-pruning=archive
To check ports go to Port Checker Website and check following ports:
30333, 9945
Only port 30333 should be opened.
Press CTRL+C to stop the node.
Launching GHOST TestNet 2.0
Switch to main GIT branch:
git switch main
Make sure ghost-node is up to date:
git pull origin main
Generating keys
Create ghost configuration directory:
sudo mkdir /etc/ghost
Give the user permission to the directory:
sudo chown $(whoami) /etc/ghost
To generate the node key use the following command:
./target/release/ghost key generate-node-key --bin --file=/etc/ghost/node-key
Generate Wallet Key file with the following command:
./target/release/ghost key generate | grep "Secret seed" | awk '{$1=$2=""; sub(/^[ \t]+/, ""); print}' > /etc/ghost/wallet-key
Display the wallet-key on the screen by using cat command:
./target/release/ghost key inspect $(cat /etc/ghost/wallet-key)
Feel free to back the file on a separate storage device.
Generate Stash Key file with the following command:
./target/release/ghost key generate | grep "Secret seed" | awk '{$1=$2=""; sub(/^[ \t]+/, ""); print}' > /etc/ghost/stash-key
Display the stash-key on the screen by using cat command:
./target/release/ghost key inspect $(cat /etc/ghost/stash-key)
Generate Session Key file with the following command:
./target/release/ghost key generate | grep "Secret seed" | awk '{$1=$2=""; sub(/^[ \t]+/, ""); print}' > /etc/ghost/session-key
You have generates 4 types of Session Keys:
- Session Key – AUDI
- Session Key – BABE
- Session Key – SLOW
- Session Key – GRAN
Now let's display them!
Display the session-key//audi on the screen by using cat command:
./target/release/ghost key inspect "$(cat /etc/ghost/session-key)//audi"
Display the session-key//babe on the screen by using cat command:
./target/release/ghost key inspect "$(cat /etc/ghost/session-key)//babe"
Display the session-key//slow on the screen by using cat command:
./target/release/ghost key inspect "$(cat /etc/ghost/session-key)//slow"
Display the session-key//gran on the screen by using cat command:
./target/release/ghost key inspect "$(cat /etc/ghost/session-key)//gran" --scheme=ed25519
Build and start the ghost-node
Recompile ghost-node using starter.sh and --release flag.
Make ghost-node service being able to be started by default user
using --make-global:
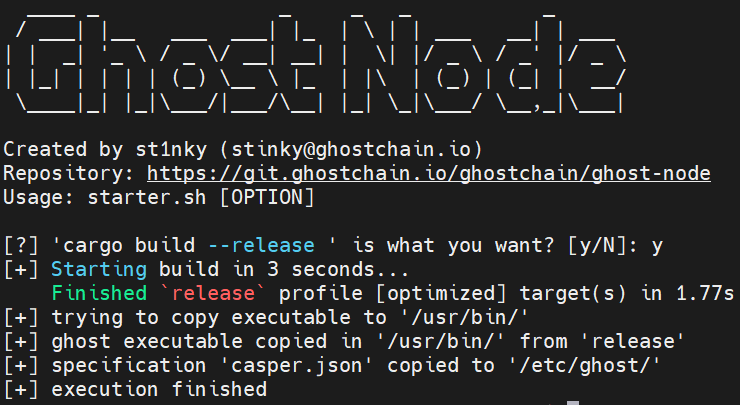
./scripts/starter.sh --release --make-global
We need to recompile so type y and press Enter to proceed:
Recompiling will take some time!
The script needs higher permissions to write the ghost-node startup file, so it may ask for your user's password
Check the hash of the build:
sha256sum /etc/ghost/casper.json
You should see:
6c1bab2e9c04043814b5e5e72984b00ac60150bd48cb16068495f1b49fbc5008
Create running ghost-node service that starts on system boot using --unit-file flag.
And we must set up the ghost-node launch command by setting arguments using
--set-arguments flag:
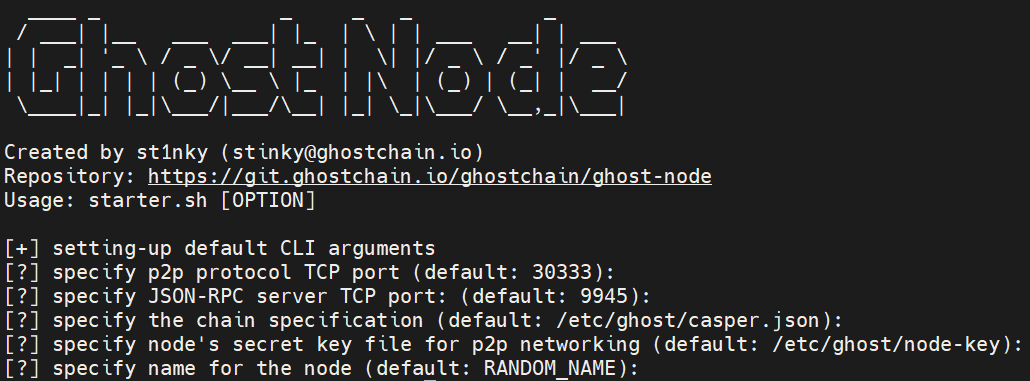
./scripts/starter.sh --unit-file --set-arguments
Only change the defaults if you are advanced otherwise press Enter for the following prompts.
If this is your first node simply press Enter to proceed with the default.
If this is your second node you should type a different port here,
for example 30334, and then you should open this port on your firewall
and create a dedicated port forwarding rule on your router as specified
in the Testing Connectivity Part:
specify p2p protocol TCP port (default: 30333): 30334
To choose default options press Enter here:
Currently, you have to qualify to become a validator node through GHOST Whales.
If you were NOT included in the ghosties file then you cannot be a validator node,
and you can only be a full node so for disable validator mode? [y/N] type y.
If you were included in the ghosties file you can press Enter:
disable validator mode? [y/N]: y
Press Enter for reject enabling Prometheus:
For the following prompt:
list of bootnodes if any:
Paste one of available Boot Node addresses.
Official Boot Node addresses:
/dns/bootnode69.chain.ghostchain.io/tcp/30334/p2p/12D3KooWF9SWxz9dmy6vfndQhoxqCa7PESaoFWEiF8Jkqh4xKDRf
/dns/bootnode70.chain.ghostchain.io/tcp/30333/p2p/12D3KooWP3h5dSdqcpvsCr7fp1jyfqDj291QDZ68a4gY6VQ8T1nW
A full list of available Boot Nodes can be found on the guide page.
Press Enter:
Changing unit-file name is optional, otherwise press Enter:
Type y and press Enter for create dedicated user for running ghost-node:
DO NOT start and enable ghost-node.service press Enter:
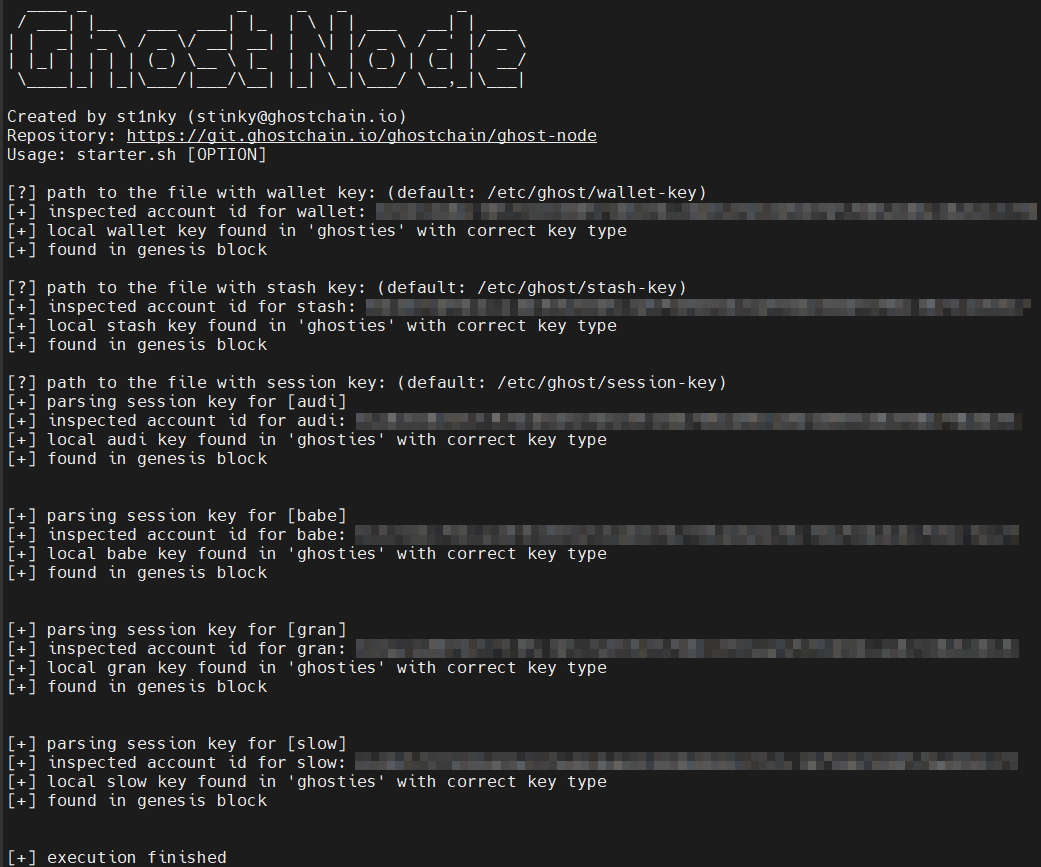
Now you can check whether or not the keys on your GHOST Node match those
in the ghosties file on GHOST Git.
If you are running a Validator Node and if you have followed
the Generating Keys Part you will see all [+].
If you are a running a Full Node you will see errors:
(Press Enter for prompts)
./scripts/starter.sh --check-keys
Full Node:
Validator Node:
Start ghost-node:
sudo systemctl start ghost-node
Wait 60 seconds!
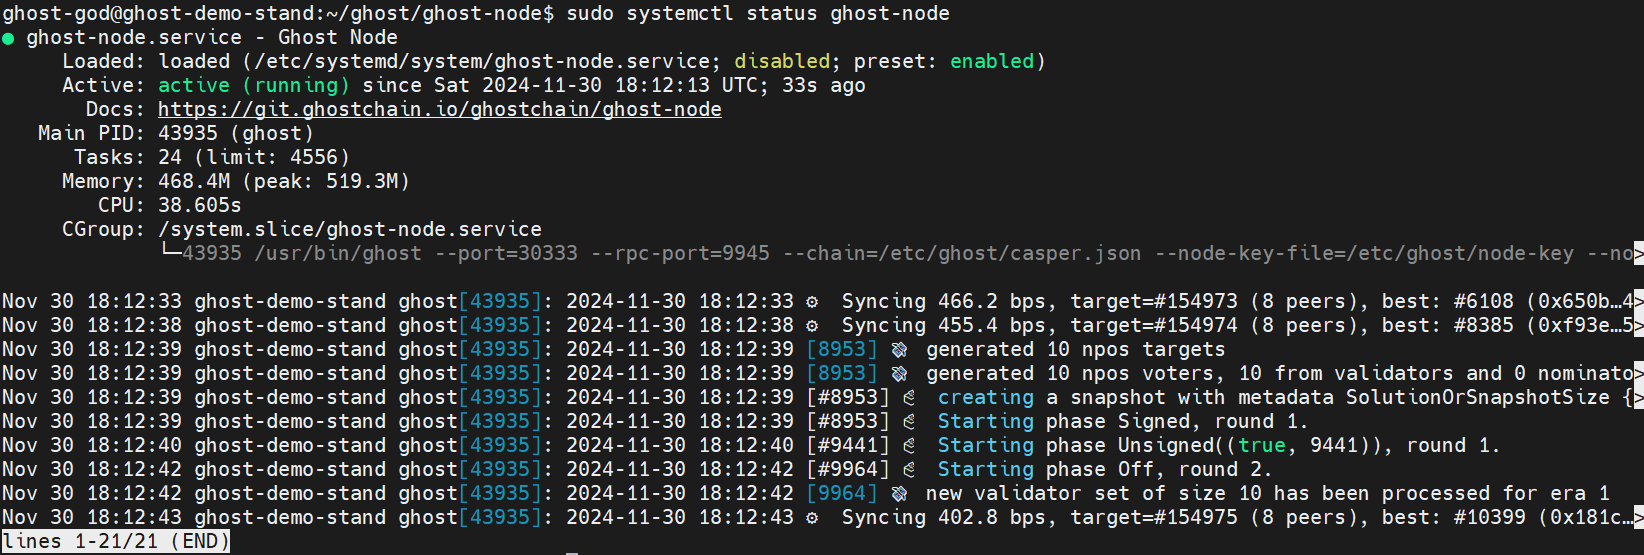
Check node is started:
sudo systemctl status ghost-node
For exit press CTRL+C
In order to insert keys run the following flags --check-keys --insert-keys:
./scripts/starter.sh --check-keys --insert-keys
Restart ghost-node:
sudo systemctl restart ghost-node
Enable ghost-node:
sudo systemctl enable ghost-node
To see the logs produced by your ghost-node:
journalctl -f -u ghost-node
To exit press CTRL+C.
Congratulations! You have an operational GHOST Node.


